Friday, February 8, 2013

Valentines Pinterest Night

Last night we had our pinterst girls night. We made Candy Kebabs, Eye Heart U cards, and Lotto Valentines.


All of these were super easy and super fun!

Milk and Cookies

My baby girl turned ONE and to celebrate her becoming of legal milk drinking age we had a milk and cookies party. I had seen so many cute ideas on pinterest, too many to pull off, but I did do a few that turned out so cute. I made the banner just by hanging strips of crepe paper on a string and used a cricut to make the banner. I scored at Hobby Lobby because all the glass jars were on sale the week of the party so I got the milk bottles and cookie jars for a great price.
I also wanted to do a milk mustache photo booth, I was going to just set up a table and hang the back drop but instead I just transformed our entertainment center into a photo booth.
 I got the mustache mold on Amazon...


It was such a fun little party, and it was super easy and delicious!

Tuesday, February 5, 2013

Super Hero Party

My Son turned 3 yesterday and thanks to Pinterest I have been planning his party in my head for a few months. Unfortunately life got super busy and I wasn't able to put all the fun Pinterest ideas into action, but I did get a few done and than I came up with a few of my own ideas to make things easier for me.
I knew one thing I really wanted to do was to have masks for all the kids, I got a template here


Some of the masks I had seen had two different colors and so you could see the outline of the different color along the edge. I attempted this but I realized too late my big mistake. I cut all the masks the same size and thought I would just off set the contrasting color when I sewed it, but that just made it difficult to keep my stitch lines looking nice. Next time, if there is a next time, I will make the contrasting color bigger so that when I sew it I only have to worry about sewing around the edges of the front piece. But these 3 year olds didn't even notice my sewing flaws!

I had wanted to make capes but it was going to be a little too expensive and tricky. I thought about making arm cuffs, but after sewing the masks I knew that was not an option for me. Ten days before the party I was at a friends and Cooper was playing with her sons Captain America shield. It was essentially a Frisbee with a handle. So I decided to have the kids decorate their own Frisbee shields at the party. I got Frisbees from discountmug.com and when I ordered 12 blank Frisbees they were only 58 cents a piece and they did free shipping, and they were delivered to my door in 6 days. I was two Frisbees short because I didn't think about counting how many kids would be there before I placed my order, ( I also wished I would have thought about ordering red ones). I ended up getting some Frisbees from the dollar store last minute and made this great Captain America shield for Cooper. The dollar store Frisbees were bigger, flat and I got a red one so that I could just use a little blue and white sticker foam to make this. After I had all the Frisbees I saw some at Walmart for only 50 cents, I should have known!

Once I got the frisbees we drilled four little holes in them so that I could loop elastic through them to use as a handle.

The kids had a fun time decorating their shields, we used the sticker foam and I used cookie cutters to make an imprint so that it was easy to cut out shapes and letters for them. I also had pre cut foam sticker letters and some Avengers stickers they could use.

I also found Batman, Spider-Man, and Avengers valentines at the dollar store. I used the valentines to make banners to hang up around the house and I used the stickers, magnets and tattoos to put in the treat bags along with some Super Hero Pez dispensers, Ring Pops, and stretchy flying super hero toys.

I always like to do a pinata at birthday parties. They are so easy to make and kids love them. I mix 1 part flour to 2 parts water and then I used an old magazine and cut it into strips and then just dip the strips and cover a balloon leaving a 3-4 inch hole at whichever end you want at the top. I usually do one layer, let it dry over night, then once it is dry I tie string all around the pinata tying it at the hole so that it will hold, then I do another good layer of soggy magazine strips. I let it dry overnight and then on day 3 I pop the balloon, but only if it is COMPLETELY dry. Then I paint it. The balloon is a great head shape. In the past I have done Mr. Potato Head, Foofah- from Yo Gabba Gabba, and this year I did Spiderman. Also you only need 2 layers of paper mache to make a good breakable pinata. Year one I did like 6 layers and when the pinata rope broke and the pinata fell to the ground it barely cracked and my husband ended up having to stomp on and tear open the pinata. Year two I did 3 layers and it was still a little too sturdy and my husband had to stomp and tear it open. this year it cracked open from the wacking of a 3 year old, but we still needed to do a little tearing to get all the candy out.

We had an obstacle course set up for the super heroes to practice their moves. We kept it simple, first they had to fly and weave around some boxes, then they had to crawl through a tunnel, then jump over some smaller boxes and then finally stand on the foot rest and jump into a pile of pillow. With 12 little kids it was chaos but they loved it.
 
After the obstacle course I had a gang of bad balloon bandits hanging outside. I had taken balloons, put a glass rock marble think in them to weight them down a little, and then blew them up. Then I used black duck tape to make a mask and cut out 2 inch circles from label paper and cut the circles in half to make eyes. I drew in pupils and frowny mean mouths and hung about 15 of those bad guys from our overhang outside. The kids loved punching and fighting these bad guys. It was so fun to watch and the best part was at the end any that hadn't popped were tangled together in a bunch, just like a group of villains in the movies! I wish I had a picture of that but they got cut down before I got the picture.


For lunch we had Wonder Dogs, Mighty Mac &Cheese, Power Puff Cheese Puffs, fruit and a spider man cake.

I loved dreaming about some darling ideas I got from pinterest but in the end I didn't have time to make a city skyline back drop or cute labels and food wrappers. We still had a fabulous party! And of course I wish I had gotten some better pictures...

Monday, December 24, 2012

Felt Nativity

 
I liked the idea of this Felt Nativity, it took me a while but I just finished!

I started this almost 2 weeks ago. It takes time to make this many pieces. I was already feeling overwhelmed with crafts I wanted to do. I ended up saying forget it, no more crafts, I want to enjoy time with my hubby and kids. But I still really wanted to do this Nativity. So I decided to do a 12 days of Christmas, that way I only had to make one or two pieces a day. Our Elf on the Shelf delivered one or two pieces a day and it made it extra fun for our son to be able to get a little Elf gift each day and it gave me a chance everyday to tell him a little bit about the birth of our Savior. This will definitely be a fun tradition each year!

 On a simple scale of 1-10 this gets an 8, pretty simple, just time consuming. The templates are awesome. I made my own donkey though, and I strayed a little bit from the templates for the beards and mustaches and wise man gifts. I also put the stable on a large board, just because I wanted to.

Tuesday, December 11, 2012

Holly Jolly Olliblocks

I couldn't resist the Winter Olliblocks! I discovered them a little late in the season but I am just glad they exist!

Click here to go to my Olliblock post...

Tuesday, December 4, 2012

Noel

I loved this idea for my Christmas shelf! Noel

The blog it came from is not in English but she has some cute pictures on there. Mine did not turn out as cute, but I still love it! I just used letters from Hobby Lobby and a twig wreath. I wrapped the L in Jute and I used a metallic blue paint for the E and just a cream for the N. I bought a fake twig branch that had some sparkle beads on it and then intertwined some of the branches into my wreath to add a little bling, then for fun I added some lights.

On a fun scale of 1-10 this got a 10! I love, it was crazy easy and looks nice on my bookshelf!

Christmas on Canvas

I made these super easy canvas decorations using these pins: O Holy Night, Singing Loud, and
 
 
This was such an easy project and I love how they turned out. I just downloaded the free printables, there are a lot to choose from if you explore free Christmas printable on pinterest. I got some 11x14 photo prints made at Costco for $2.99 each. I took my canvas and painted the edges to match the photo. I had to trim just a sliver off of each photo edge and then I put a thin layer of mod podge on the back of the photo and placed it on the canvas. I then turned the canvas over and pressed all along the back of the canvas to make sure the photo stuck. I waited about 10 minutes to let it dry and then I painted a nice layer of mod podged all over the front and especially the edges. I used a wide sponge brush for one of them and a roller sponge for the other. They both had a different texture when dried. The roller left a smoother texture with tiny tiny bumps and the sponge brush left a bit of a lined texture, but both are only noticeable up close. Since the top layer was thicker it took about 20 minutes to dry. I know a lot of my friends have mod podged pictures onto wood, this is the same only canvas is much lighter and easier to hang.
On an easy scale of 1-10 these get a 9, super duper easy and its a cheap and quick way to add some Christmas cheer to your home.
We are making these for our pinterest club which is why I ordered the canvas online. It is cheap, but the shipping is more than its probably worth if you are just ordering a few, but if you want to do a group order I think it is a good way to go. And if you donate $5 to the art group on their website standard shipping is free!

Monday, November 26, 2012

Kid Mode

My life just got so much easier thanks to this pin: Kid Mode
Sometimes it gets so annoying when I let my kids play with my phone and I get it back and some of the apps are moved around or missing. It is also annoying when they click on ads every 30 seconds,  and I have to help them exit out and get back to the game. On the other hand it is so nice to be able to distract them with the iPhone and keep them quiet in public, and there are so many fun learning games for toddlers that the kids like to use. I had heard rumors that there was a way to lock the phone or iPad so kids couldn't roam around on it but I was never able to figure it out, until last night, and I am so so happy that I know how to put my stuff in kid mode now!!
Click to the link for more details instructions, but basically you go to your Settings, tap on General, scroll down to Accessibility, once in Accessibility there is a section titled Learning and underneath you can click on the Guided Access. Turn the Guided Access to ON and set a pass code. Once that is done all you have to do before giving your kid your phone is go to the app, push your home button 3 times quickly and that will pull up the guided access screen, you can circle any parts of the screen (like ads or volume) that you don't want the kids to be able to touch, and then hit start.
On a makes my life easier scale of 1-10 I am giving this a perfect 10! Wish I knew about it sooner!

Monday, November 19, 2012

Fall Pears

For our November Pinterest Club we made these cute little pears
The picture tutorial pretty much explains it all, these were so easy and they are so cute, I am going to be making a few more today to decorate my Thanksgiving table and when I am done using them for fall decor I am just going to display them in a fun vase, they are fun year round!


We used the Natural Jute, in both the light and dark color, from Hobby Lobby, it is only $3.29 for 400 feet and you need about 6 yards of the dark for 1 pear and about 8 yards of the lighter color for 1 pear.One roll of twine of the dark will make over 20 pears! The darker is much easier to work with but its fun to have two colors. I thought about using some red and yellow yarn to add more color to the table but I don't think I will. You could probably paint them though- I will be trying that after I make a bunch more. I thought my light bulbs looked a little too narrow at the top so I just went back and wrapped a double layer of twine over the skinny part and I liked that look a little better. We used hot glue and just glued as we wrapped. On the skinny part I just glued a few lines for about an inch vertically down the bulb and then twirled and wrapped really fast but along the wider part the twine slips so you need to glue more horizontally as you wrap.
On an easy scale of 1-10 I give these an 8.5 for super easy, it just can get a little tricky around the wide part- but you can go back over bare spots!! On a pain scale of 1-10 they get a 4, I had little glue blisters all over my thumbs from the hot glue! Ouch! It was worth the pain though, I love them!!

Saturday, October 13, 2012

Ollibird Blocks

 
From this Pin: Olliblocks
 
I had seen this pin but didn't pin it. Then a friend recommended this for our pinterest craft night and it was so fun and cute, however when I went back to find the pin I couldn't find it. But it is a cute craft and super duper easy. I was very impressed with ollibird.com the PDF for three sets of blocks: boy, girl, and animal was $12. I was a little concerned that each person would need to purchase their own set to use but I read all the fine print and they actually encouraged sharing the PDF for a craft night or activity, with as many people as you want, as long as you didn't use it for commercial use or profit. They also gave excellent instructions and links to places to buy blocks and label paper. I didn't have time to order blocks for our pinterest club night, so I got a few 2x2x8 pieces of wood from Home depot for $1.49 each. I pulled out my husbands chop saw, took about 10 minutes to figure out how to get the safety latch off, and got to sawing. I discovered that the 2x2s were actually 1.5x1.5, which was fine because the PDF comes with labels for the 2x2 blocks and the 1.5x1.5 blocks, and it meant that one piece of wood made 60 1.5 inch blocks. I didn't worry about sanding the blocks too much because the sticker covered them, I just rubbed the edges of the blocks on the cement a few times to smooth out the splinters. The website recommended printing the copies at a professional printer so that the ink wouldn't bleed when mod podged so I went to Office Max. I bought my full sheet white label paper there as well. The label paper was about 50 cents a sheet and the color copies were 49 cents each. We had 12 people coming to craft night so we all chipped in $1 for the PDF and then $1 for each sheet of guys and then $1 for blocks and supplies so for $5 each person got a set of 9 darling blocks.  It was a little more time consuming to cut all the squares and trim them to fit the blocks just right but it was so worth it in the end!
 
Look how cute all these little outfits are!! I love them!
 
I ended up giving my set as a birthday gift the following day and my son keeps asking when he is going to get his blocks! I think I will be making them for birthday and Christmas gifts for nieces and nephews as well as baby gifts for a few friends!
On a difficulty scale of 1-10 I give them a 3 mostly because it was time consuming and I had to use a big saw! But we had a big group of girls all on different levels of craftiness and everyone seemed happy with the end result!


Wednesday, October 3, 2012

Halloween Door

I got the ideas for my Halloween door from these pins: Spider Magnets and Boo Wreath
 
I love the spidey door magnets, but I could only find a few big spiders around my house and I keep forgetting to get little ones at the store but soon enough I will have some baby spiders on my door as well! I just used little magnets I had laying around and tacky glue. My magnets are a little too powerful so for the next round I am going to buy some different magnets that won't tear off the spider because they are too attached to the door. For my wreath I just used an old black bed sheet that I had bought at one point for a back drop or something. I also used a hay type wreath I found on clearance and I didn't paint it or even take it out of the plastic. I turned on a show, and started cutting strips of fabric. Then I tied and I tied and I tied until it was all covered in raggedy messy fabric. Then I modge podged the paper to the letters and attached them and added some google eyes because it looked like a monster. My husband didn't want me to re-paint the door orange just for the season, and I was okay with that.
 
 
The spiders had a deeper well in the body so I filled it with hot glue before using tacky glue for the magnet. It is holding up okay.
On a scale of 1-10 these were a 10, so easy it was scary. The wreath too, just time consuming but so easy anyone can do it!
 

Monday, October 1, 2012

Pinterest Night

 
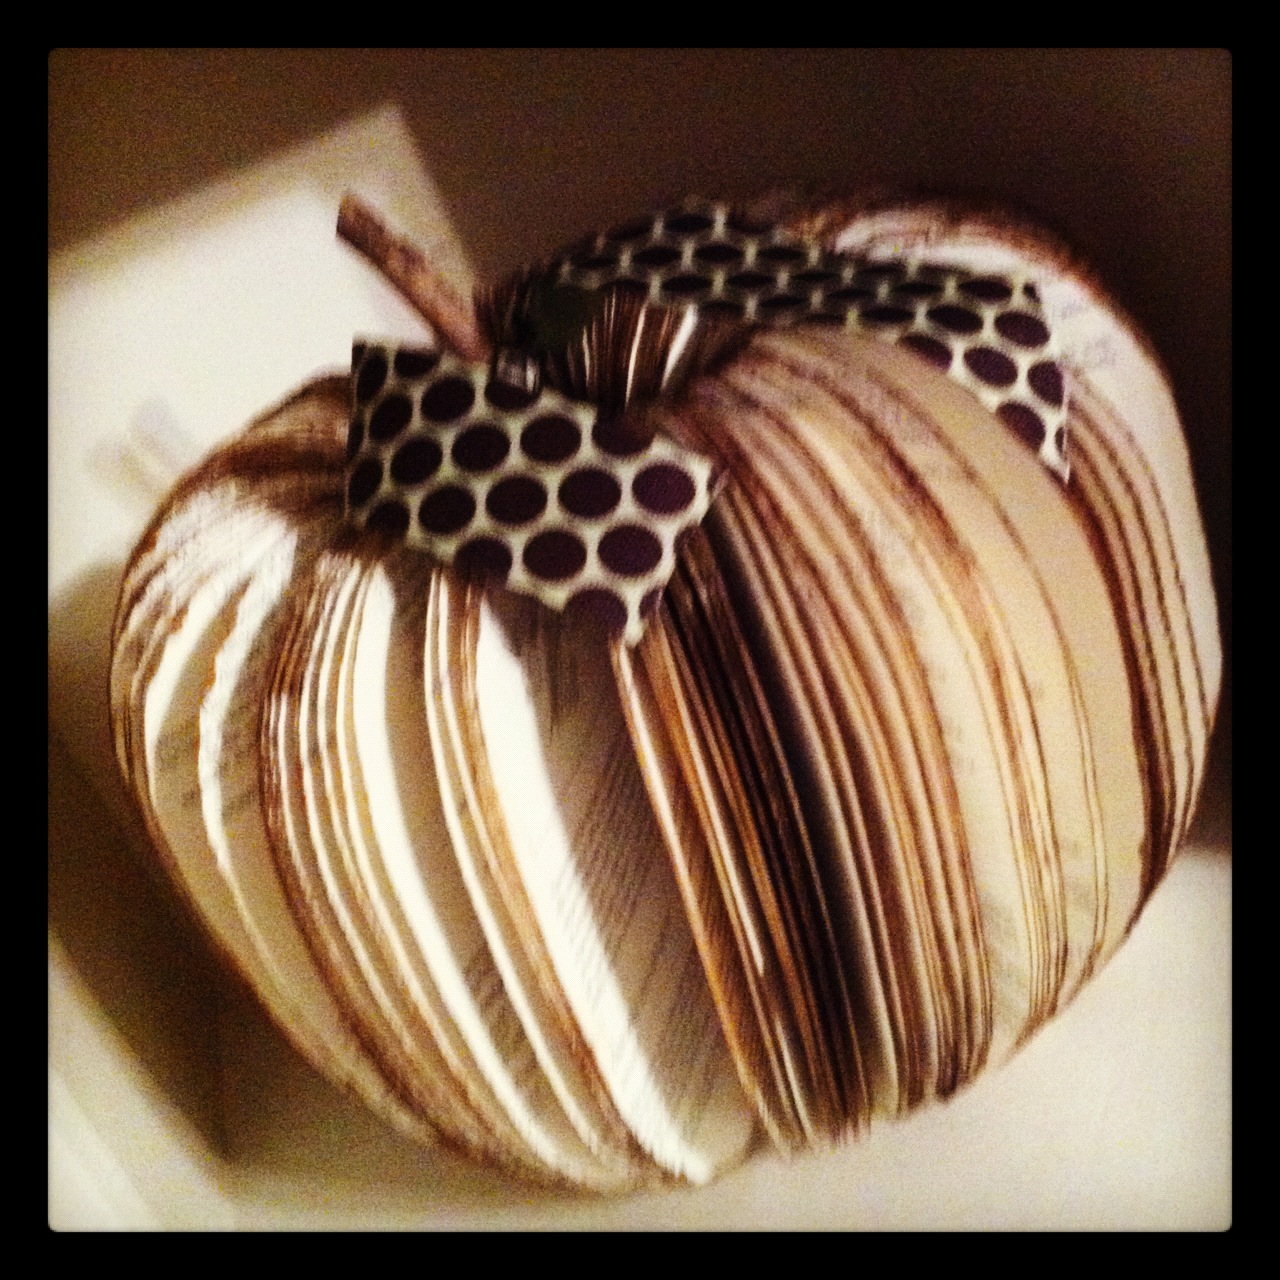
Two months ago a friend and I decided to started a Pinterest Club. One night a month we have a girls night to do a pinterest craft and try out some pinterest recipes. It's a little crazy, but its been way fun! This month we got our craft from this pin, Pumpkin Book, and the recipes from these pins: Owl Smores, Coconut Banana Bread, and Pumpkin Crescents.


Pinterest night is great. The host pics a craft, prices it out and gets all the supplies. A few of us signed up to bring a treat and then everyone just shows up to snack and craft. We had 16 girls there for this project so it got a little crazy but it was a blast. The host had cut out several stencil shapes for the pumpkins, some were shorter and more round, others were taller and straighter. We also had several book sizes. I think you would want at least 400 pages in your paper back book. Some girls had 800 -1000 pages. Some girls used scissors to cut the pages others used razor blades which gave it a bit more of a shabby look. After the entire book was cut we softened the binding by separating the pages maybe 10-20 at a time and bending them back at the binding. Then we used either copper, orange or brownish paint and just painted the edges of the book, some soaked theirs more than others so that the painted seeped further into the book. Then we took some branches and hot glued the binding around the branch and topped it with a bow. Easy and very inexpensive!


And the treats were delicious. I made the coconut banana bread and had I not been distracted and over cooked it, I think it would have been my new favorite. Even over baked it was still moist and delicious. The pumpkin crescents were super easy. The recipe said to cut the crescents in half before filling them and rolling them so that you would have 32 in the end. I had a hard time not making a giant mess so I made 16 rolls and then after they had baked I cut them in half and by cutting them it pressed the middle closed so the insides didn't goo out. Also I added 5-6 big chocolate chips to each roll and I am glad I did. They are not very sweet so the chocolate was a nice touch.
Both recipes were super easy, and on a yummy scale of 1-10 I give them an 8. The books were much easier than I thought, on a tricky scale of 1-10 I would give them a 3.5 and on a messy scale they get an 8. Cutting up books is messy!! And pinterest night  on a fun scale of 1-10 always gets a 10! If you have friends who like to eat and talk and craft I highly recommend starting a pinterest club!
 

Sunday, September 23, 2012

Earthquake Cake

This delicious recipe is from this pin: Earthquake Cake
 
This is my new go to recipe for when I take dinner to a friend. It is so good that I could eat the entire 9x13 pan! So at least if I take it to a friend I can make it in two pans and then I only end up eating all of an 8x8 dish. It is like an upside down German Chocolate cake. The coconut, pecans and chocolate chips are a delicious gooey surprise and I love that the frosting is basically cooked into the cake so its just extra gooey. I have made this cake 3 times in the past couple and last time while I was baking it I found myself singing This Kiss by Faith Hill, only I was singing "This cake this cake!"
And it is so EASY I don't even look up the recipe anymore! Sprinkle desired amounts of pecans, coconut and chocolate chips on the on the bottom of the greased pan, then make a German Chocolate cake mix and pour it on top. Then melt together a block of cream cheese, 1 or 2 sticks of butter, and about 3-4 cups of powdered sugar and then drizzle that on the cake and bake it. YUMMY!
On an easy scale of 1-10 its a 1.5 and on a delicious scale its a 10! Its the way you love cake, its a feeling like this, its centrifugal motion, its perpetual bliss, its that pivotal moment, it ah, subliminal, This cake THIS CAKE! Its criminal!!

Pregnant Skeleton

 
I got this fun costume idea from this pin: Pregnant Skeleton
 Last year for Halloween I was pregnant and I wanted a fun costume for my family's Halloween party so when I saw this I thought it would be great for the cooler Utah Halloween and nice and comfy for my pregnant state. I didn't use freezer paper as a stencil like she did on makeit-loveit.com but the reason I thought of this project was because this past week I used freezer paper as a shirt stencil as some friends and I made matching tank tops for a race we were running. It was amazing and would have made this project much easier. By placing the freezer paper shiny side down and ironing it to your clothes you can paint onto your clothes without the paint seeping through. Honestly, I don't know how crafty people figure this stuff out I don't even know what freezer paper is really used for but it makes an amazing clothing stencil! So last year I just cut out paper and traced it and then outlined the bones with the fabric paint that has the small tip for writing and then filled it in with paint. It took a long long time and I just free handed the baby skeleton and it was tricky. For all future painted costumes I most definitely will be using freezer paper! I actually think I may start making my own super hero shirts for Cooper to wear every day because using freezer paper is fun!

On a tricky level of 1-10 I give this about a 7.5. It was a little tedious and I had really hoped there would have been a skeleton stencil. I wish I could provide a stencil here, but I don't have one. The bigger bones were not to bad to make free handed stencils of but the baby skeleton was pretty tricky, It may be easiest to blow up the picture on the computer and print it out and then cut it out of the freezer paper. On a comfy costume for a pregnant lady this got a 9 for super comfy and I wished I could have worn it with out feeling silly for more than just Halloween parties and Halloween.