I loved this idea for my Christmas shelf! Noel
The blog it came from is not in English but she has some cute pictures on there. Mine did not turn out as cute, but I still love it! I just used letters from Hobby Lobby and a twig wreath. I wrapped the L in Jute and I used a metallic blue paint for the E and just a cream for the N. I bought a fake twig branch that had some sparkle beads on it and then intertwined some of the branches into my wreath to add a little bling, then for fun I added some lights.
On a fun scale of 1-10 this got a 10! I love, it was crazy easy and looks nice on my bookshelf!
On a crafty scale of 1-10 I used to consider myself a pretty crafty 8. Then I got onto pinterest and realized I am more like a 5. Determined to step up on the craft ladder I am now doing more than just pinning, I am creating, and blogging... hopefully...
Showing posts with label Easy Craft. Show all posts
Tuesday, December 4, 2012
Christmas on Canvas
I made these super easy canvas decorations using these pins: O Holy Night, Singing Loud, and
This was such an easy project and I love how they turned out. I just downloaded the free printables, there are a lot to choose from if you explore free Christmas printable on pinterest. I got some 11x14 photo prints made at Costco for $2.99 each. I took my canvas and painted the edges to match the photo. I had to trim just a sliver off of each photo edge and then I put a thin layer of mod podge on the back of the photo and placed it on the canvas. I then turned the canvas over and pressed all along the back of the canvas to make sure the photo stuck. I waited about 10 minutes to let it dry and then I painted a nice layer of mod podged all over the front and especially the edges. I used a wide sponge brush for one of them and a roller sponge for the other. They both had a different texture when dried. The roller left a smoother texture with tiny tiny bumps and the sponge brush left a bit of a lined texture, but both are only noticeable up close. Since the top layer was thicker it took about 20 minutes to dry. I know a lot of my friends have mod podged pictures onto wood, this is the same only canvas is much lighter and easier to hang.
On an easy scale of 1-10 these get a 9, super duper easy and its a cheap and quick way to add some Christmas cheer to your home.
We are making these for our pinterest club which is why I ordered the canvas online. It is cheap, but the shipping is more than its probably worth if you are just ordering a few, but if you want to do a group order I think it is a good way to go. And if you donate $5 to the art group on their website standard shipping is free!
Monday, November 19, 2012
Fall Pears
For our November Pinterest Club we made these cute little pears
The picture tutorial pretty much explains it all, these were so easy and they are so cute, I am going to be making a few more today to decorate my Thanksgiving table and when I am done using them for fall decor I am just going to display them in a fun vase, they are fun year round!
We used the Natural Jute, in both the light and dark color, from Hobby Lobby, it is only $3.29 for 400 feet and you need about 6 yards of the dark for 1 pear and about 8 yards of the lighter color for 1 pear.One roll of twine of the dark will make over 20 pears! The darker is much easier to work with but its fun to have two colors. I thought about using some red and yellow yarn to add more color to the table but I don't think I will. You could probably paint them though- I will be trying that after I make a bunch more. I thought my light bulbs looked a little too narrow at the top so I just went back and wrapped a double layer of twine over the skinny part and I liked that look a little better. We used hot glue and just glued as we wrapped. On the skinny part I just glued a few lines for about an inch vertically down the bulb and then twirled and wrapped really fast but along the wider part the twine slips so you need to glue more horizontally as you wrap.
On an easy scale of 1-10 I give these an 8.5 for super easy, it just can get a little tricky around the wide part- but you can go back over bare spots!! On a pain scale of 1-10 they get a 4, I had little glue blisters all over my thumbs from the hot glue! Ouch! It was worth the pain though, I love them!!
The picture tutorial pretty much explains it all, these were so easy and they are so cute, I am going to be making a few more today to decorate my Thanksgiving table and when I am done using them for fall decor I am just going to display them in a fun vase, they are fun year round!
We used the Natural Jute, in both the light and dark color, from Hobby Lobby, it is only $3.29 for 400 feet and you need about 6 yards of the dark for 1 pear and about 8 yards of the lighter color for 1 pear.One roll of twine of the dark will make over 20 pears! The darker is much easier to work with but its fun to have two colors. I thought about using some red and yellow yarn to add more color to the table but I don't think I will. You could probably paint them though- I will be trying that after I make a bunch more. I thought my light bulbs looked a little too narrow at the top so I just went back and wrapped a double layer of twine over the skinny part and I liked that look a little better. We used hot glue and just glued as we wrapped. On the skinny part I just glued a few lines for about an inch vertically down the bulb and then twirled and wrapped really fast but along the wider part the twine slips so you need to glue more horizontally as you wrap.
On an easy scale of 1-10 I give these an 8.5 for super easy, it just can get a little tricky around the wide part- but you can go back over bare spots!! On a pain scale of 1-10 they get a 4, I had little glue blisters all over my thumbs from the hot glue! Ouch! It was worth the pain though, I love them!!
Saturday, October 13, 2012
Ollibird Blocks
From this Pin: Olliblocks
I had seen this pin but didn't pin it. Then a friend recommended this for our pinterest craft night and it was so fun and cute, however when I went back to find the pin I couldn't find it. But it is a cute craft and super duper easy. I was very impressed with ollibird.com the PDF for three sets of blocks: boy, girl, and animal was $12. I was a little concerned that each person would need to purchase their own set to use but I read all the fine print and they actually encouraged sharing the PDF for a craft night or activity, with as many people as you want, as long as you didn't use it for commercial use or profit. They also gave excellent instructions and links to places to buy blocks and label paper. I didn't have time to order blocks for our pinterest club night, so I got a few 2x2x8 pieces of wood from Home depot for $1.49 each. I pulled out my husbands chop saw, took about 10 minutes to figure out how to get the safety latch off, and got to sawing. I discovered that the 2x2s were actually 1.5x1.5, which was fine because the PDF comes with labels for the 2x2 blocks and the 1.5x1.5 blocks, and it meant that one piece of wood made 60 1.5 inch blocks. I didn't worry about sanding the blocks too much because the sticker covered them, I just rubbed the edges of the blocks on the cement a few times to smooth out the splinters. The website recommended printing the copies at a professional printer so that the ink wouldn't bleed when mod podged so I went to Office Max. I bought my full sheet white label paper there as well. The label paper was about 50 cents a sheet and the color copies were 49 cents each. We had 12 people coming to craft night so we all chipped in $1 for the PDF and then $1 for each sheet of guys and then $1 for blocks and supplies so for $5 each person got a set of 9 darling blocks. It was a little more time consuming to cut all the squares and trim them to fit the blocks just right but it was so worth it in the end!
Look how cute all these little outfits are!! I love them!
I ended up giving my set as a birthday gift the following day and my son keeps asking when he is going to get his blocks! I think I will be making them for birthday and Christmas gifts for nieces and nephews as well as baby gifts for a few friends!
On a difficulty scale of 1-10 I give them a 3 mostly because it was time consuming and I had to use a big saw! But we had a big group of girls all on different levels of craftiness and everyone seemed happy with the end result!
Monday, October 1, 2012
Pinterest Night
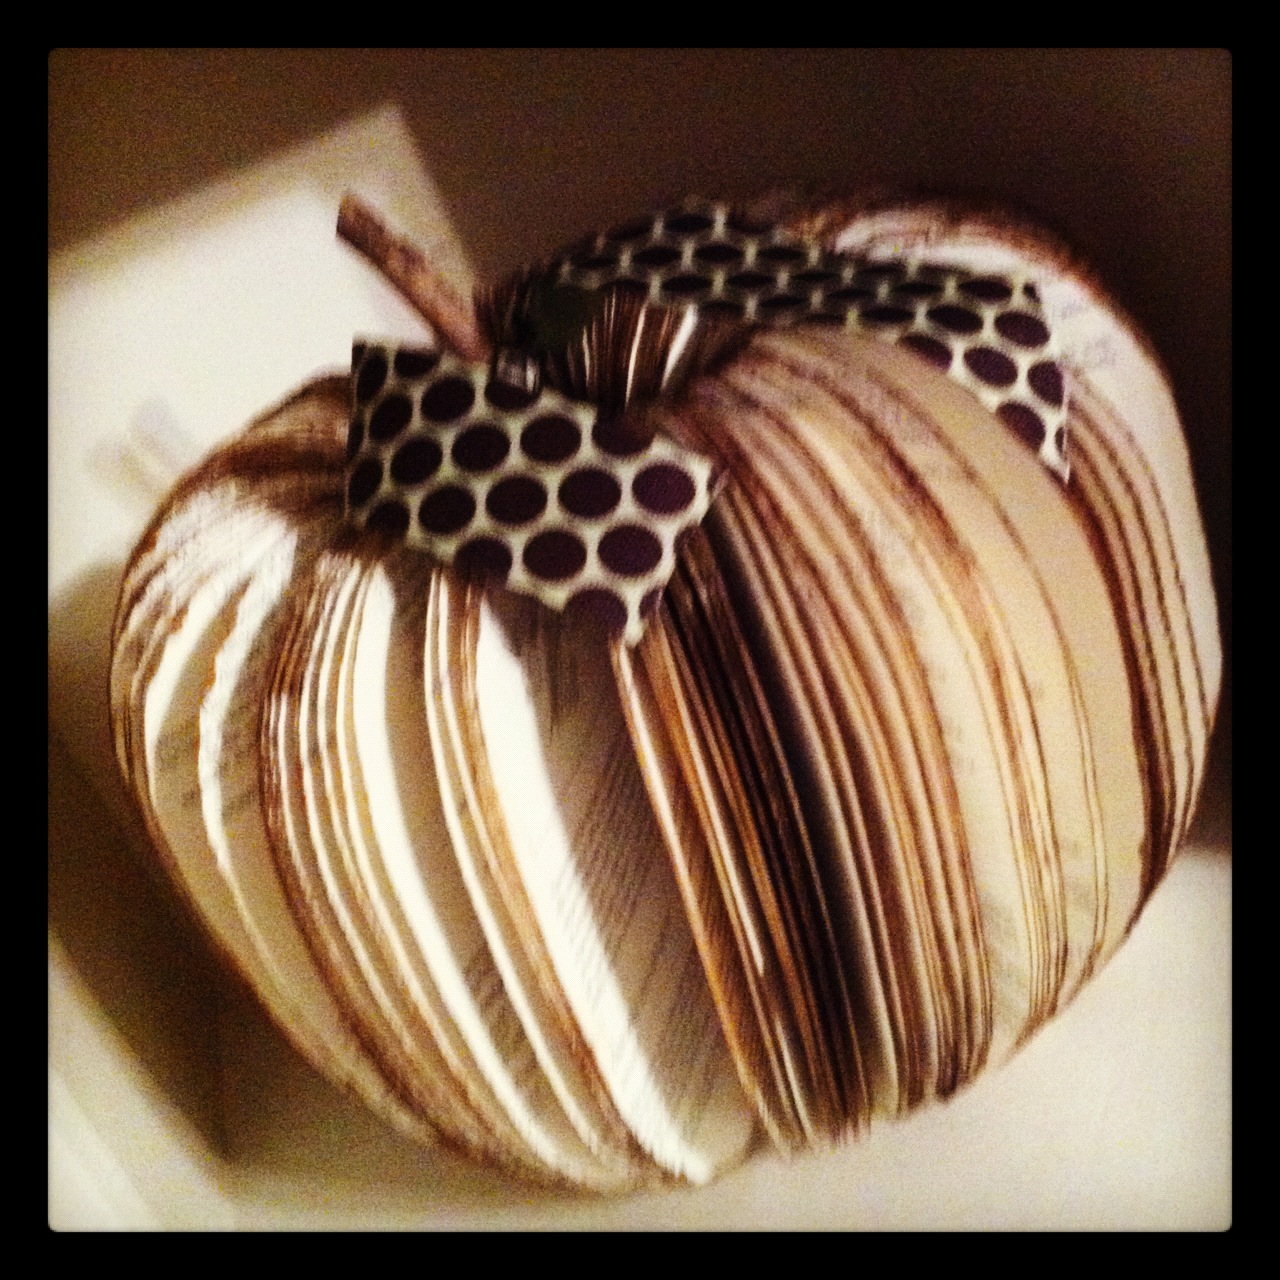
Two months ago a friend and I decided to started a Pinterest Club. One night a month we have a girls night to do a pinterest craft and try out some pinterest recipes. It's a little crazy, but its been way fun! This month we got our craft from this pin, Pumpkin Book, and the recipes from these pins: Owl Smores, Coconut Banana Bread, and Pumpkin Crescents.
Pinterest night is great. The host pics a craft, prices it out and gets all the supplies. A few of us signed up to bring a treat and then everyone just shows up to snack and craft. We had 16 girls there for this project so it got a little crazy but it was a blast. The host had cut out several stencil shapes for the pumpkins, some were shorter and more round, others were taller and straighter. We also had several book sizes. I think you would want at least 400 pages in your paper back book. Some girls had 800 -1000 pages. Some girls used scissors to cut the pages others used razor blades which gave it a bit more of a shabby look. After the entire book was cut we softened the binding by separating the pages maybe 10-20 at a time and bending them back at the binding. Then we used either copper, orange or brownish paint and just painted the edges of the book, some soaked theirs more than others so that the painted seeped further into the book. Then we took some branches and hot glued the binding around the branch and topped it with a bow. Easy and very inexpensive!
And the treats were delicious. I made the coconut banana bread and had I not been distracted and over cooked it, I think it would have been my new favorite. Even over baked it was still moist and delicious. The pumpkin crescents were super easy. The recipe said to cut the crescents in half before filling them and rolling them so that you would have 32 in the end. I had a hard time not making a giant mess so I made 16 rolls and then after they had baked I cut them in half and by cutting them it pressed the middle closed so the insides didn't goo out. Also I added 5-6 big chocolate chips to each roll and I am glad I did. They are not very sweet so the chocolate was a nice touch.
Both recipes were super easy, and on a yummy scale of 1-10 I give them an 8. The books were much easier than I thought, on a tricky scale of 1-10 I would give them a 3.5 and on a messy scale they get an 8. Cutting up books is messy!! And pinterest night on a fun scale of 1-10 always gets a 10! If you have friends who like to eat and talk and craft I highly recommend starting a pinterest club!
Wednesday, September 19, 2012
Monster Jars
I loved these cute jars from this pin: Monster Jars
I was "organizing" my cupboard the other day and I had two jars that just kept getting in the way, and then I saw that I had green and white acrylic paint and I thought of these jars. I opened up one jar and squeezed in some green paint. Then I put the lid on and shook the jar until the jar was all green. Then I logged onto Pinterest, pulled up this pin, and read the instructions on how to get the black faces on. Well once again I learned that I need to read the pin before I start the craft! She didn't use paint for this project, she modge podged tissue paper to the outside of the jar and then she modge podged the faces on, and then she can put a votive in the jar. Weeellll I had already started and I didn't have any tissue paper that wasn't pink so I just decided to go with the paint. I put the white paint in the other mason jar, shook it till it covered and then I found a smaller jar for my orange pumpkin. I didn't have orange acrylic paint so I used my sons crayola washable paint and it is holding up okay. In case you are wondering, painting the insides of jars with leftover house paint didn't work for me, it looked good for three days but then it just separated and dried out funny and one day I looked at the jars and they looked really bad, it was a shame. Anyways, once the insides of the jars were colored I grabbed a black sharpie and started to draw on the faces. I copied how hers look because they are darling, but I didn't use her template because I was lazy. But if you don't feel comfortable drawing on the faces she has a cute template you can print out for the faces. Now because I painted the insides I don't know if light will shine through as well. I definitely won't be putting a candle in them but maybe I will pick up a few battery votives and try it out. Also I need a bit of ribbon for the lids. But for now they just sit on my shelf looking Halloweenie and I am just fine with that!
On a tricky scale of 1-10 these get a 1. So So easy and quick and if you use her stencil your jars can look just as cute as hers!
Tuesday, September 11, 2012
Caramel Apples
There is no pin for this. So maybe I am cheating a little bit crafting something I didn't see on pinterest. I actually was looking for a pin to learn how to do this last year and when I couldn't find one I asked my craft hero Melissa if she could teach me how to make these. It is so simple its ridiculous.
You will need:
Fake Apples, what ever color you choose
Sticks, I used tree branches but craft sticks, lollipop sticks, striped straws are all cute too.
Tacky Glue, its in the craft stores in the gold bottle
Acrylic Paint, we used a color from Walmart called Cinnamon
Ribbon
Bore a hole in the top of the apple for your stick. Don't make it too big, just big enough so that you can shove the stick in. You can secure it with glue if it isn't holding tight.
To make the caramel put the Tacky Glue into a cup and add the paint until it is a nice caramel color. I wish I could say how much of each but it just needs to be eyeballed.
The caramel can either be drizzled like I have done or it can be dipped like a traditional caramel apple. If you choose to dip it you want a wider bowl for the glue mixture and you will need more glue mixture to dip into, but if you want to drizzle it you can just mix the glue and paint in a paper cup and you will just need probably about 1/4-1/2 cup. To drizzle it on just pour the caramel around the stick and let it do its own dripping. The caramel will drip down a lot so you don't after the top 1/5-1/4 of the apple is covered. Put the apples on a plastic baggy (I prefer the freezer ziplocks that are a thicker plastic but just make sure you put the apple on the back of the bag and not on the label part) . Watch it for a few minutes, if it isn't drizzling like you want you can pour a little bit where you want the drizzle and as it drips down it will blend. If you choose to dip the apples dip them in the glue, you may need to roll the apple in the paint so that the caramel reaches as high as you like. Hold the apple so that it can drip off and after the bulk of the paint has dripped scape the bottom of the apple off on the edge of the bowl and place it on a plastic baggy to finish dripping and drying. The Apples need to drip and dry overnight. Once they are dry attach any ribbon you want to. We thought about coloring some glue a chocolate brown and doing brown and white chocolate looking dips or drizzles but decided not to but you can go as crazy as you'd like. I don't know if sprinkles or candies would hold up or get super gross but that could be fun too.
I did say these were simple, but its more because it is just glue and paint on an apple. There is a little bit of trickiness in getting the glue just right with the drizzle and dripping. Just remember that it may not look right but it drips a lot. On a tricky scale of 1-10 I give this about a 3.5, easy enough to tackle and you feel like a crafty rock star afterwards.
Subscribe to:
Posts (Atom)