Monday, November 26, 2012

Kid Mode

My life just got so much easier thanks to this pin: Kid Mode
Sometimes it gets so annoying when I let my kids play with my phone and I get it back and some of the apps are moved around or missing. It is also annoying when they click on ads every 30 seconds,  and I have to help them exit out and get back to the game. On the other hand it is so nice to be able to distract them with the iPhone and keep them quiet in public, and there are so many fun learning games for toddlers that the kids like to use. I had heard rumors that there was a way to lock the phone or iPad so kids couldn't roam around on it but I was never able to figure it out, until last night, and I am so so happy that I know how to put my stuff in kid mode now!!
Click to the link for more details instructions, but basically you go to your Settings, tap on General, scroll down to Accessibility, once in Accessibility there is a section titled Learning and underneath you can click on the Guided Access. Turn the Guided Access to ON and set a pass code. Once that is done all you have to do before giving your kid your phone is go to the app, push your home button 3 times quickly and that will pull up the guided access screen, you can circle any parts of the screen (like ads or volume) that you don't want the kids to be able to touch, and then hit start.
On a makes my life easier scale of 1-10 I am giving this a perfect 10! Wish I knew about it sooner!

Monday, November 19, 2012

Fall Pears

For our November Pinterest Club we made these cute little pears
The picture tutorial pretty much explains it all, these were so easy and they are so cute, I am going to be making a few more today to decorate my Thanksgiving table and when I am done using them for fall decor I am just going to display them in a fun vase, they are fun year round!


We used the Natural Jute, in both the light and dark color, from Hobby Lobby, it is only $3.29 for 400 feet and you need about 6 yards of the dark for 1 pear and about 8 yards of the lighter color for 1 pear.One roll of twine of the dark will make over 20 pears! The darker is much easier to work with but its fun to have two colors. I thought about using some red and yellow yarn to add more color to the table but I don't think I will. You could probably paint them though- I will be trying that after I make a bunch more. I thought my light bulbs looked a little too narrow at the top so I just went back and wrapped a double layer of twine over the skinny part and I liked that look a little better. We used hot glue and just glued as we wrapped. On the skinny part I just glued a few lines for about an inch vertically down the bulb and then twirled and wrapped really fast but along the wider part the twine slips so you need to glue more horizontally as you wrap.
On an easy scale of 1-10 I give these an 8.5 for super easy, it just can get a little tricky around the wide part- but you can go back over bare spots!! On a pain scale of 1-10 they get a 4, I had little glue blisters all over my thumbs from the hot glue! Ouch! It was worth the pain though, I love them!!

Saturday, October 13, 2012

Ollibird Blocks

 
From this Pin: Olliblocks
 
I had seen this pin but didn't pin it. Then a friend recommended this for our pinterest craft night and it was so fun and cute, however when I went back to find the pin I couldn't find it. But it is a cute craft and super duper easy. I was very impressed with ollibird.com the PDF for three sets of blocks: boy, girl, and animal was $12. I was a little concerned that each person would need to purchase their own set to use but I read all the fine print and they actually encouraged sharing the PDF for a craft night or activity, with as many people as you want, as long as you didn't use it for commercial use or profit. They also gave excellent instructions and links to places to buy blocks and label paper. I didn't have time to order blocks for our pinterest club night, so I got a few 2x2x8 pieces of wood from Home depot for $1.49 each. I pulled out my husbands chop saw, took about 10 minutes to figure out how to get the safety latch off, and got to sawing. I discovered that the 2x2s were actually 1.5x1.5, which was fine because the PDF comes with labels for the 2x2 blocks and the 1.5x1.5 blocks, and it meant that one piece of wood made 60 1.5 inch blocks. I didn't worry about sanding the blocks too much because the sticker covered them, I just rubbed the edges of the blocks on the cement a few times to smooth out the splinters. The website recommended printing the copies at a professional printer so that the ink wouldn't bleed when mod podged so I went to Office Max. I bought my full sheet white label paper there as well. The label paper was about 50 cents a sheet and the color copies were 49 cents each. We had 12 people coming to craft night so we all chipped in $1 for the PDF and then $1 for each sheet of guys and then $1 for blocks and supplies so for $5 each person got a set of 9 darling blocks.  It was a little more time consuming to cut all the squares and trim them to fit the blocks just right but it was so worth it in the end!
 
Look how cute all these little outfits are!! I love them!
 
I ended up giving my set as a birthday gift the following day and my son keeps asking when he is going to get his blocks! I think I will be making them for birthday and Christmas gifts for nieces and nephews as well as baby gifts for a few friends!
On a difficulty scale of 1-10 I give them a 3 mostly because it was time consuming and I had to use a big saw! But we had a big group of girls all on different levels of craftiness and everyone seemed happy with the end result!


Wednesday, October 3, 2012

Halloween Door

I got the ideas for my Halloween door from these pins: Spider Magnets and Boo Wreath
 
I love the spidey door magnets, but I could only find a few big spiders around my house and I keep forgetting to get little ones at the store but soon enough I will have some baby spiders on my door as well! I just used little magnets I had laying around and tacky glue. My magnets are a little too powerful so for the next round I am going to buy some different magnets that won't tear off the spider because they are too attached to the door. For my wreath I just used an old black bed sheet that I had bought at one point for a back drop or something. I also used a hay type wreath I found on clearance and I didn't paint it or even take it out of the plastic. I turned on a show, and started cutting strips of fabric. Then I tied and I tied and I tied until it was all covered in raggedy messy fabric. Then I modge podged the paper to the letters and attached them and added some google eyes because it looked like a monster. My husband didn't want me to re-paint the door orange just for the season, and I was okay with that.
 
 
The spiders had a deeper well in the body so I filled it with hot glue before using tacky glue for the magnet. It is holding up okay.
On a scale of 1-10 these were a 10, so easy it was scary. The wreath too, just time consuming but so easy anyone can do it!
 

Monday, October 1, 2012

Pinterest Night

 
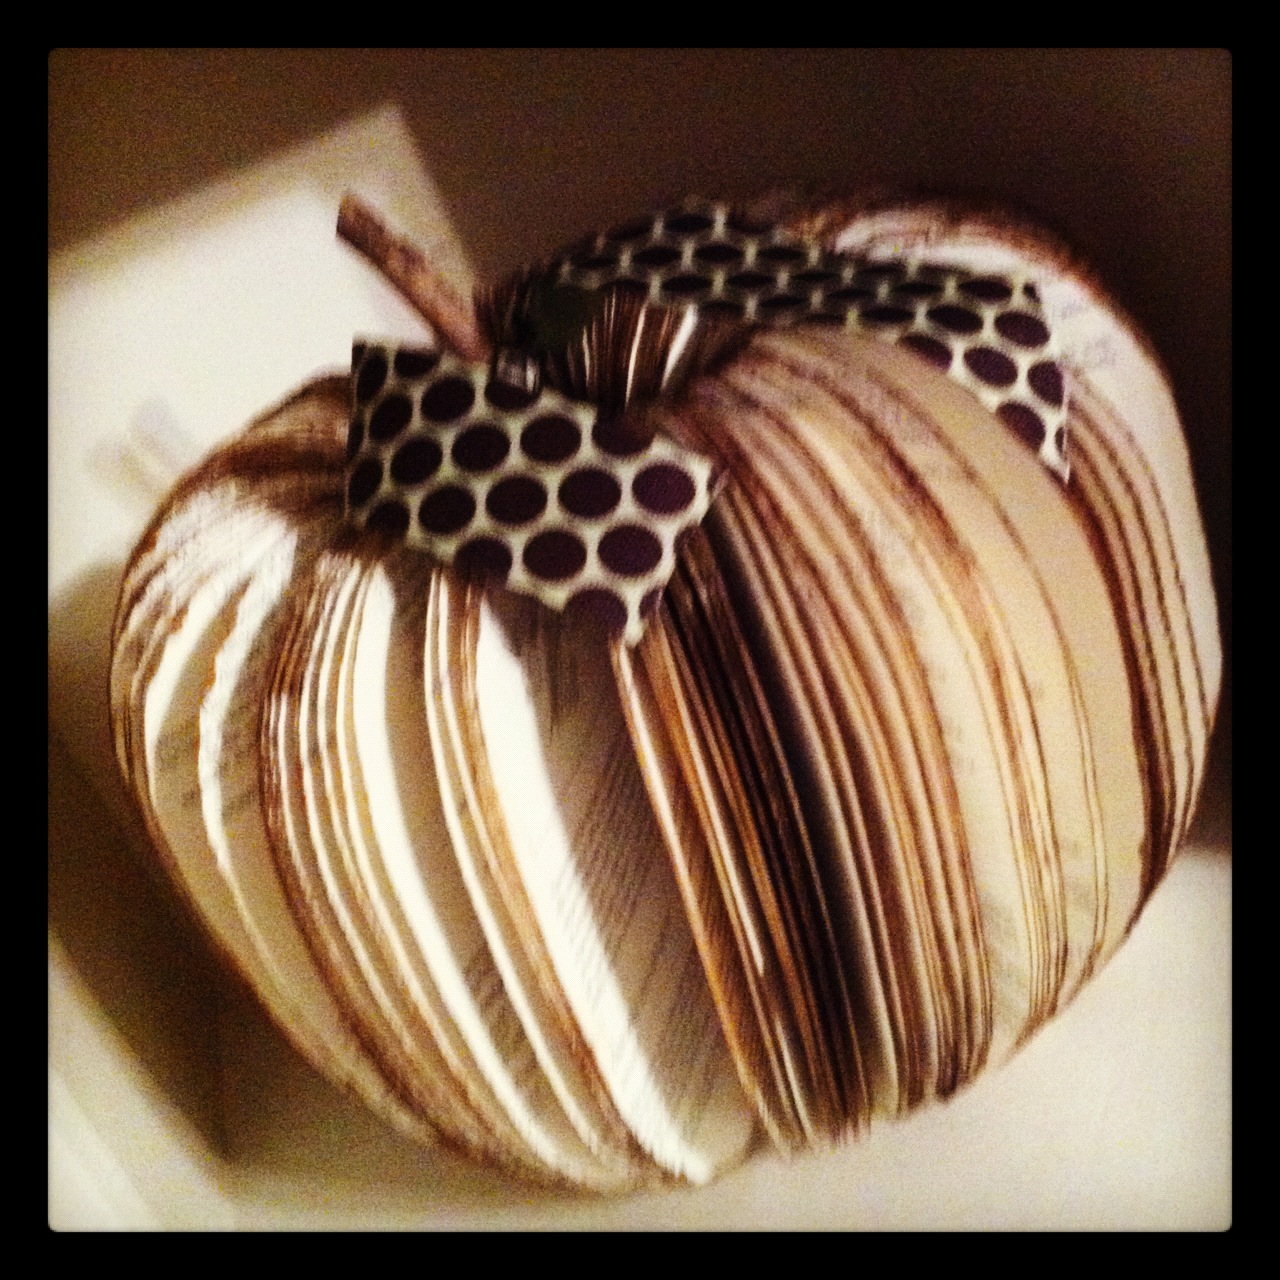
Two months ago a friend and I decided to started a Pinterest Club. One night a month we have a girls night to do a pinterest craft and try out some pinterest recipes. It's a little crazy, but its been way fun! This month we got our craft from this pin, Pumpkin Book, and the recipes from these pins: Owl Smores, Coconut Banana Bread, and Pumpkin Crescents.


Pinterest night is great. The host pics a craft, prices it out and gets all the supplies. A few of us signed up to bring a treat and then everyone just shows up to snack and craft. We had 16 girls there for this project so it got a little crazy but it was a blast. The host had cut out several stencil shapes for the pumpkins, some were shorter and more round, others were taller and straighter. We also had several book sizes. I think you would want at least 400 pages in your paper back book. Some girls had 800 -1000 pages. Some girls used scissors to cut the pages others used razor blades which gave it a bit more of a shabby look. After the entire book was cut we softened the binding by separating the pages maybe 10-20 at a time and bending them back at the binding. Then we used either copper, orange or brownish paint and just painted the edges of the book, some soaked theirs more than others so that the painted seeped further into the book. Then we took some branches and hot glued the binding around the branch and topped it with a bow. Easy and very inexpensive!


And the treats were delicious. I made the coconut banana bread and had I not been distracted and over cooked it, I think it would have been my new favorite. Even over baked it was still moist and delicious. The pumpkin crescents were super easy. The recipe said to cut the crescents in half before filling them and rolling them so that you would have 32 in the end. I had a hard time not making a giant mess so I made 16 rolls and then after they had baked I cut them in half and by cutting them it pressed the middle closed so the insides didn't goo out. Also I added 5-6 big chocolate chips to each roll and I am glad I did. They are not very sweet so the chocolate was a nice touch.
Both recipes were super easy, and on a yummy scale of 1-10 I give them an 8. The books were much easier than I thought, on a tricky scale of 1-10 I would give them a 3.5 and on a messy scale they get an 8. Cutting up books is messy!! And pinterest night  on a fun scale of 1-10 always gets a 10! If you have friends who like to eat and talk and craft I highly recommend starting a pinterest club!
 

Sunday, September 23, 2012

Earthquake Cake

This delicious recipe is from this pin: Earthquake Cake
 
This is my new go to recipe for when I take dinner to a friend. It is so good that I could eat the entire 9x13 pan! So at least if I take it to a friend I can make it in two pans and then I only end up eating all of an 8x8 dish. It is like an upside down German Chocolate cake. The coconut, pecans and chocolate chips are a delicious gooey surprise and I love that the frosting is basically cooked into the cake so its just extra gooey. I have made this cake 3 times in the past couple and last time while I was baking it I found myself singing This Kiss by Faith Hill, only I was singing "This cake this cake!"
And it is so EASY I don't even look up the recipe anymore! Sprinkle desired amounts of pecans, coconut and chocolate chips on the on the bottom of the greased pan, then make a German Chocolate cake mix and pour it on top. Then melt together a block of cream cheese, 1 or 2 sticks of butter, and about 3-4 cups of powdered sugar and then drizzle that on the cake and bake it. YUMMY!
On an easy scale of 1-10 its a 1.5 and on a delicious scale its a 10! Its the way you love cake, its a feeling like this, its centrifugal motion, its perpetual bliss, its that pivotal moment, it ah, subliminal, This cake THIS CAKE! Its criminal!!

Pregnant Skeleton

 
I got this fun costume idea from this pin: Pregnant Skeleton
 Last year for Halloween I was pregnant and I wanted a fun costume for my family's Halloween party so when I saw this I thought it would be great for the cooler Utah Halloween and nice and comfy for my pregnant state. I didn't use freezer paper as a stencil like she did on makeit-loveit.com but the reason I thought of this project was because this past week I used freezer paper as a shirt stencil as some friends and I made matching tank tops for a race we were running. It was amazing and would have made this project much easier. By placing the freezer paper shiny side down and ironing it to your clothes you can paint onto your clothes without the paint seeping through. Honestly, I don't know how crafty people figure this stuff out I don't even know what freezer paper is really used for but it makes an amazing clothing stencil! So last year I just cut out paper and traced it and then outlined the bones with the fabric paint that has the small tip for writing and then filled it in with paint. It took a long long time and I just free handed the baby skeleton and it was tricky. For all future painted costumes I most definitely will be using freezer paper! I actually think I may start making my own super hero shirts for Cooper to wear every day because using freezer paper is fun!

On a tricky level of 1-10 I give this about a 7.5. It was a little tedious and I had really hoped there would have been a skeleton stencil. I wish I could provide a stencil here, but I don't have one. The bigger bones were not to bad to make free handed stencils of but the baby skeleton was pretty tricky, It may be easiest to blow up the picture on the computer and print it out and then cut it out of the freezer paper. On a comfy costume for a pregnant lady this got a 9 for super comfy and I wished I could have worn it with out feeling silly for more than just Halloween parties and Halloween.